Do you recognize this vibrato?
This effect has been created by an LFO and in this article you will see how. We will explain what a LFO is and will give you examples of how to use it with different synthesizers so you can eventually make it work in any.
What is a LFO?
The letters LFO stand for “Low Frequency Oscillator”. This means that it is an oscillator, but not an oscillator that works like the rest you have in your synthesizer.
The oscillator of an LFO is of low frequency, usually below 20HZ – and therefore out of the range of human listening. Why would we want an oscillator that cannot be heard?
We use the LFO to influence how other parameters of the synthesizer sound, to give life and movement to the sound that is heard. We refer to the typical vibratos that sound when the pitch is modulated or the hums that are created when sweeping followed by filter, to make tremolo, phasing effects, etc. If you’re interested to learn more about synthesis, we recommend you to look at this easy to follow course on Basic Synthesis.
How does it work?
To make the LFO work, what we do is route its signal to the parameter we want. What this signal does is oscillate the movement of the parameter we have chosen, as if you were moving it yourself, but automatically and more comfortably, and achieving a more interesting sound. You control the speed of this movement through its Rate parameter, which we will see later.
The part of the routing has to be understood well, otherwise we could fall into the beginner’s mistake of turning the parameters of the LFO section without hearing any change in the sound and ending up thinking that they do nothing. Therefore, apart from selecting the wave parameters, adjusting the rate and so on, you have to identify the destination in your synthesizer so that the LFO signal can get there.
Have a look at how we set it with different synthesizers and DAWs:
Ableton Live
Here’s how to get the LFO signal to Ableton Live’s Analog synthesizer. As you will see, we have to find the LFO parameter in each section of the synthesizer, and add the amount of signal that you want to enter. Note that you have two LFOs, each one affecting its corresponding oscillator:
Logic Pro X
On the Logic Pro X ES2, instead, you have to go to the routing section and adjust the Target (the affected parameter), the Via (the control that allows you to adjust the amount of signal), and the Source (the signal influencing the Target). The ES2 also has two LFOs, the first polyphonic and the second monophonic:
Minimoog Voyager
In an analog synthesizer, such as the Minimoog Voyager, you will see that visually it is very easy to understand. If you want to discover the sonic possibilities with the powerful Moog 37, you can’t miss this free masterclass chapter. On the Via buses – the Mod. Wheel (the one that allows you to control the amount of LFO with the modulation wheel to the left of the keyboard) and the Pedal / on (allows you to control the amount of LFO with a pedal) – you can see that first it makes you choose the Source (LFO source) and below the Destination (the parameter that will be influenced by your LFO source):
LFO Basic Parameters
Waveforms
The LFO generator is normally a periodic wave oscillator that repeats itself based on its ratio, such as a Sine , Triangular, Sawtooth, or Rectangular wave.
But also, the LFO sections will include random generators that are not periodic such as noise or side chain inputs that allow an external audio input to act as a modulation source.
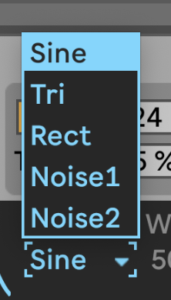 Ableton Live’s Analog source options
An option you’ll also see on many synths is Sample and Hold (S&H), which refers to the procedure of taking samples of a noise signal at regular intervals. The values of those samples are then retained until the next sample is taken.
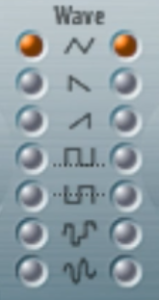
Logic Pro X’s ES2 source options
In the case of the Logic Pro X ES2, you will see that the bottom two waves of the LFO produce random values following this S&H principle. A random value is selected at regular intervals, depending on the speed of the LFO. The upper random wave jumps between random values, rapid changes between values. The random bottom wave is smoothed out, resulting in smooth shifts between values.
Note that we have the S&H option in the Minimoog Voyager. In this, the Sample and Hold Circuit takes samples from the analog input signal and hold them for particular period of time and then outputs the sampled part of input signal. If you are into analog synths you should check out this masterclass.to discover all the possibilities from these machines by a well recognised international artist and synth collector.
Rate Control
The Rate control sets the speed at which the LFO oscillates, measured in cycles per second, or Hertz. Increase or decrease this value to speed up or slow down the modulation.
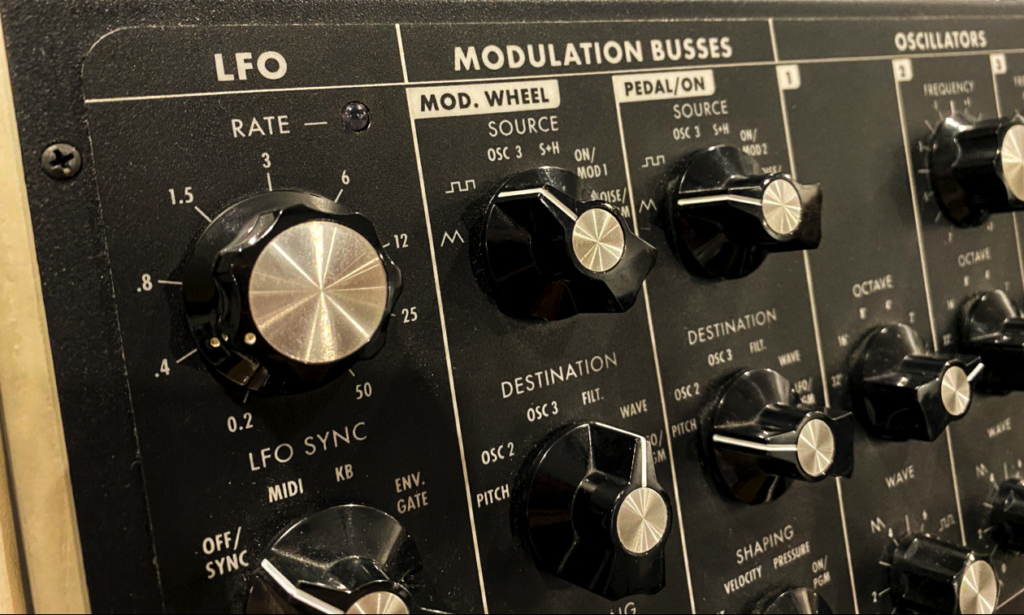
“Rate”, “Sources” and “Destinations” of the Minimoog Voyager
Rates can often be synced to a division of the beat and hence based on the tempo of the session. Typical nomenclature for divisions include:
1/8 — 8th note
1/8t — 8th note triplet
1/8d — dotted 8th note
1/16 — 16th note
1/16t — 16th note triplet
1/16d — dotted 16th note
etc.
Divisions can be as small as a 1/64 note and up to 32 bars for long structural transitions.
Other parameters
Your LFO section may have other parameters such as envelope options (attack, decay, etc.), offset (it defines when the wave starts) or retrigger / reset(define that the LFO wave always starts from zero every time it enters a midi note). Take a look at the example with Ableton’s Analog:
LFO uses
1 – As we said at the beginning, with the LFO you can create the typical vibratos that sound when modulating the pitch or cutoff, to make tremolos, or the typical special effects of many science fiction movies using random noises as the source of the LFO.
2- LFOs also come in handy to change the timbre or textures of a synth or beat. Modulate an oscillator, single cycle waveform, or random one-shot sample with an LFO to apply different sonic characteristics to sequenced beats over time. For example, If you want to add something to a bass line with a boring texture, one way of going about it is to use an LFO. For example, you can modulate its pitch or its frequency cutoff while adding a bit of distortion and bit reduction to make it sound as an acid bassline.
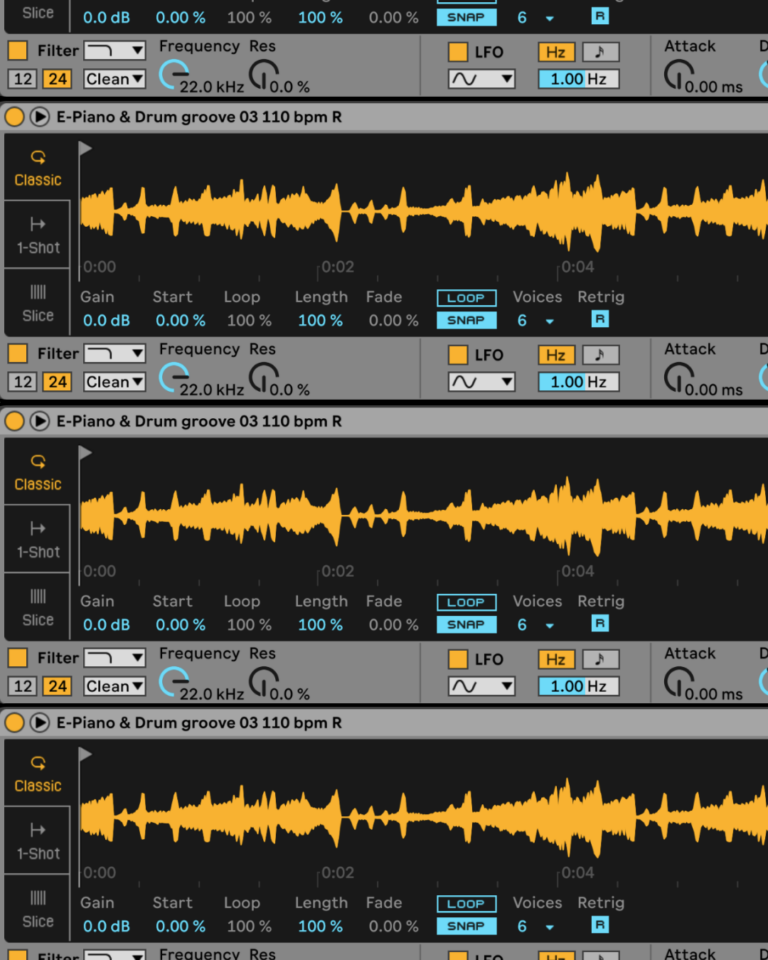
3- They are also very helpful to make monotonous continuous sounds more dynamic and interesting. For example, you can make a quarter note electronic hi-hat less boring, by using an LFO to modulate destinations like the volume or the pan. Watch an example doing this in the Sampler of Ableton Live, in which you also have the possibility of adding an LFO:
Look out! Ableton’s Analog has an option called Retrig (in other synthesizers you can find it as ‘Reset’) you can switch by clicking on a box with an R. It retriggers the LFO every time there is a note being played. So, it does not make sense having this parameter On when you have many notes being played fast, since you will not be able to hear the effect that the LFO is doing.
We hope this introduction to LFOs has been helpful to you and helps you experiment with them to find interesting sounds in your synthesizers, whatever you use. If you have doubts about what we have explained or related questions, you can leave us a comment below.
Fundamentals of Music Production




 50 Industry Music Production Tips You Must Know


