You are creating a new track and you start to try kicks and bass sounds. You already have your bass line written or maybe you are waiting for its sound to inspire you and determine the notes that make it up. The point is that you start to adjust parameters and, almost without realizing it, you are already doing mixing tasks in the arrangement phase. There’s nothing wrong with this, most producers do this, and in fact it can help you shape the track and continue its arrangement, as long as you don’t get stuck in the mixing process.
Next, we are going to give you some kick & bass useful tips from our instructors at Aulart which they apply to their own productions while composing:
1 – Choose a good kick sound
One of the basics of any quality production is choosing well-made sounds. You can create them yourself or you can use sound samples, as long as they are royalty free and their use is allowed.
PRO TIP: choose sounds created by experienced producers and within the style you want to do. For example, Chris Liebing has a collection of 30 kicks that he makes available to the users of his Masterclass, which are very useful for recreating the Berlin-style techno sound.
2 – Work the shape of your kick
Even if you use kicks that are already perfect and have the sound you are looking for, that does not mean that you don’t have to adapt them to the needs of your track. For example, it might be a kick that sounds great on its own, but then you realize that it bothers the other elements by being too short or too long. A quick way to make it shorter is by using the audio fade out tool found in all DAWs.
To make it longer, you can add a bit of reverb to it, and then render it into audio. Then, combine the new rendered track with the original one, in order to recover the attack you might have lost.
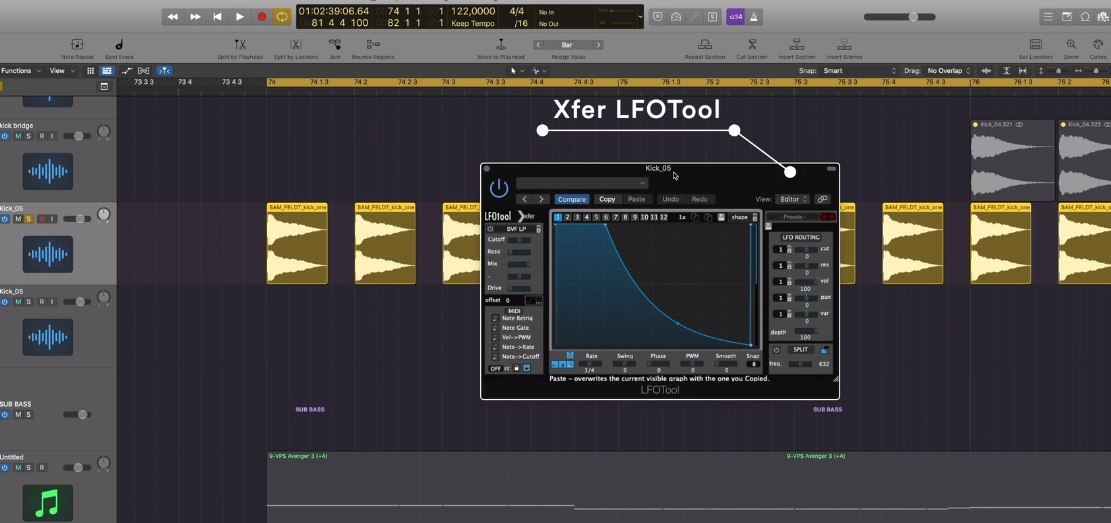
PRO TIP: For better control of the sound of your kick, Danny Avila recommends using an LFO:
3 – Tune the kick
We will never get tired of saying it: it is necessary to tune the percussion sounds. Especially at first, it may seem that it is not necessary, because when played together with other sounds that have their own tuning, it seems to fit well. However, if you are looking for the general clarity of your track, especially when it already has many elements playing at the same time, this is one of the main keys to achieve it.
PRO TIP: Hannes Bieger tells us that “the objective is to place the kick in a place where it works harmonically well with the bass line, to save us the effort of mixing them later.” One way to do this is by searching for the note on a keyboard, or analyzing the notes with a tuner or an EQ that shows them to you.
4 – Divide your bass in two
When playing the tracks of our favorite artists through good speakers, one of the aspects that we enjoy the most is the deep bass that it transmits to us. We listen to it but we cannot appreciate it as a separate instrument. We try to increase the primary bass, but quickly realize that we are creating a big noise ball that is not at all pleasant.
Therefore, the first thing we have to do is separate our bass into at least two elements, the sub bass and the main bass, which is the one we notice the most as an instrument when we listen to the track with all the elements at the same time.
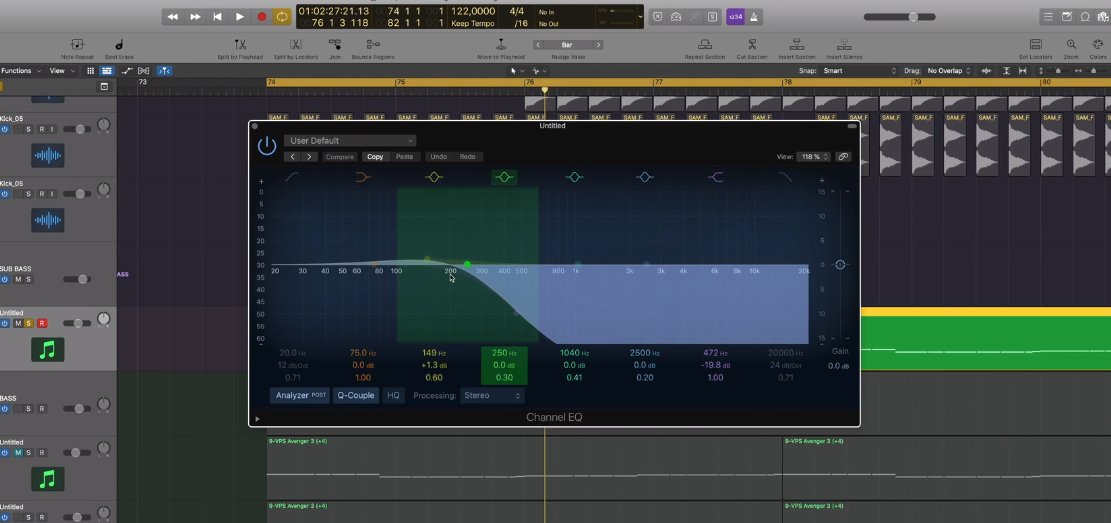
PRO TIP: A low sub usually ranges from 20HZ to 60Hz although it will depend on the loudness of your track where you make the cut. Below we show you the equalization that Danny Avila applies to the sub bass of his track “Bleeding Love”:
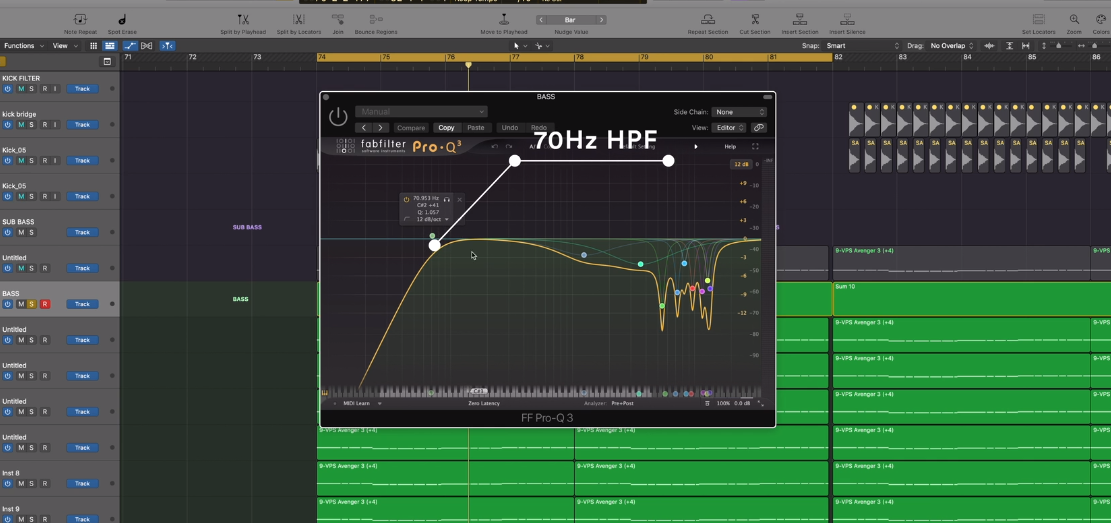
And the equalization that Danny Avila applies to the group of tracks that make up his main bass. This main bass is divided into several layers, but the same equalization is applied to the whole group:
5 – Put the Sub Bass in mono
We hear the bass in the centre, but if we analyze the bass line more carefully, we realize that it has stereo content. This is one of the issues that confuses us when we are analyzing the bass tracks of other artists that we use as reference.
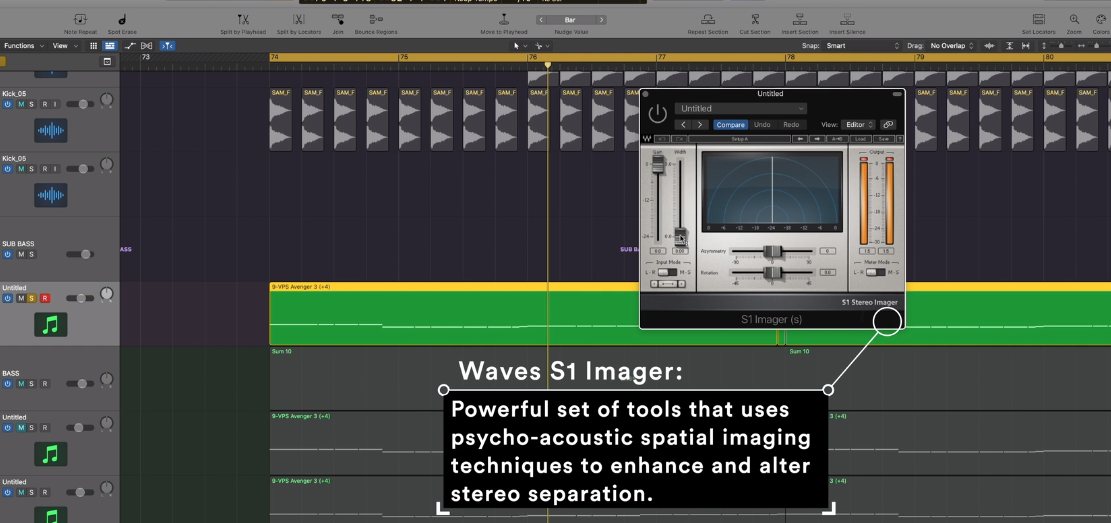
Do you remember that we just divided the bass according to its frequency content? Well then, the sub bass should stay in mono. On the other hand, the bass with high-medium content can be opened it to your liking without unbalancing the overall mix.
PRO TIP: Most DAWs have a specific plug-in to make the track totally mono. There are some that also show you the frequency content visually, such as the Waves Imager used by Danny Avila:
6 – Apply more frecuency cleaning
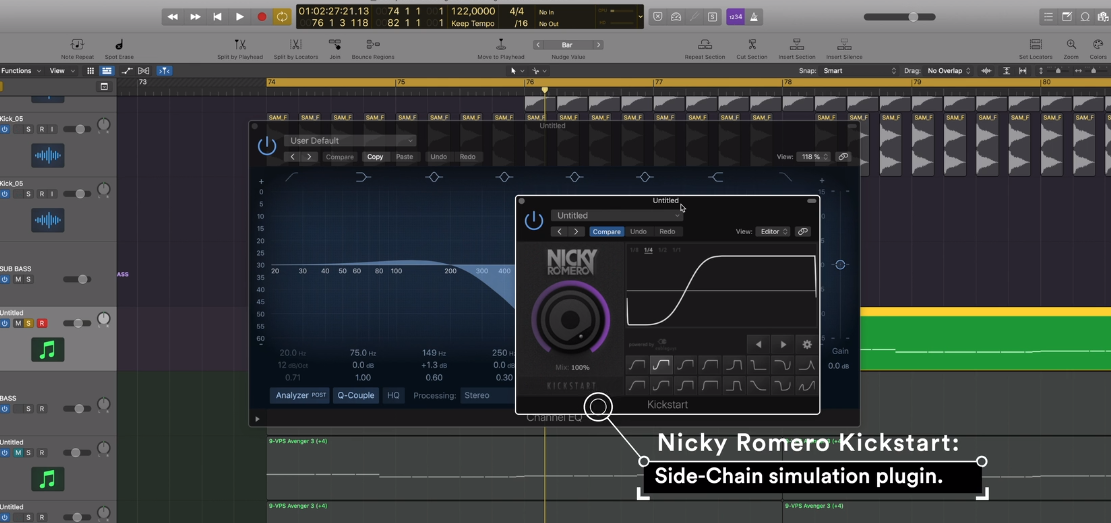
You have been working on your kick and bass for a while but you still find the bass ball in your track annoying. In this case the solution is to keep cleaning the EQ, since surely your kick and your sub bass still share too much frequency content. You can also try applying sidechained compression to cut bass content in your bass line only when the kick sounds. This technique can also add some interesting groove to your bass line, as Oscar L shows us:
You also have to consider that according to the style and sound objectives you have, and according to the frequency content of your kick, etc. maybe your track doesn’t need a sub bass line.
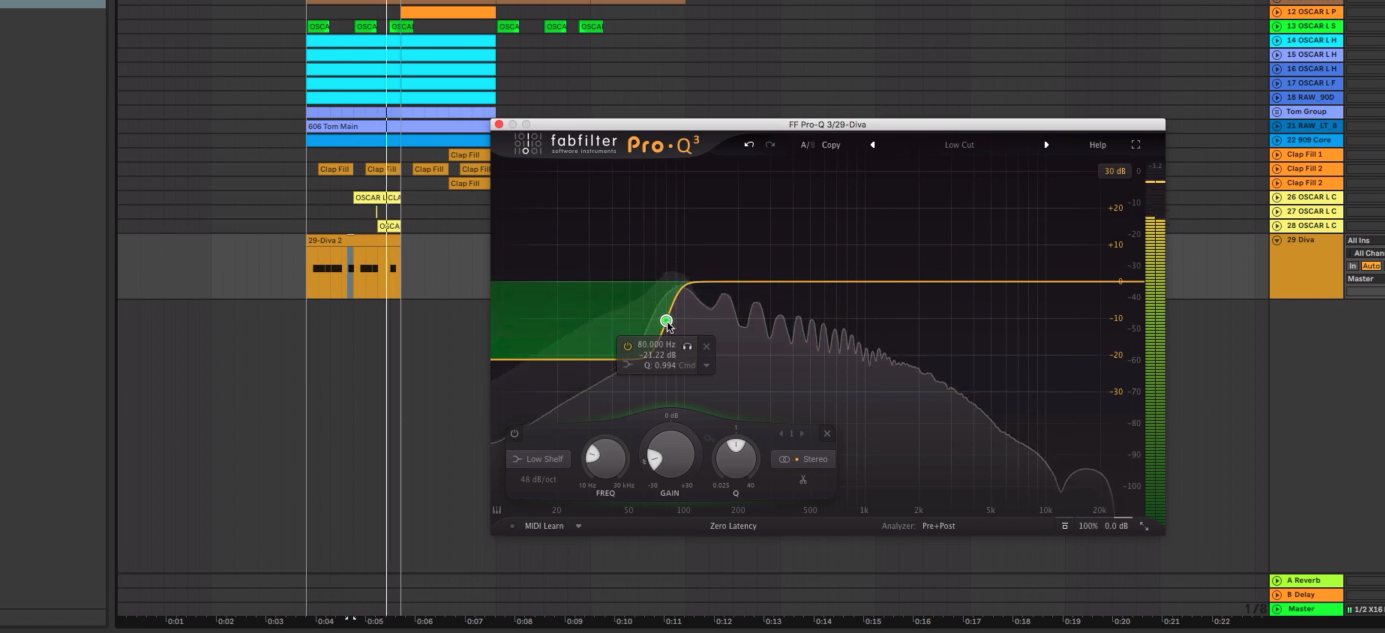
PRO TIP: Oscar L shows us how he uses a single bass line, and how instead of applying a total low cut to make room for the kick, he applies a low shelf, which is less aggressive and more appropriate in this specific case:
We hope these tips are helpful to have more ideas when dealing with your kick and bass. See how these and loads of other techniques are applied by our instructors in their Masterclass. Don’t wait and find out more about them!



 50 Industry Music Production Tips You Must Know


