Are you into old-school gaming? Do the retro sounds of 8-bit and 16-bit videogames fascinate you? In this article, we’ll give you some tips to emulate your favourite classic consoles “fakebit-style” and turn your DAW into a chiptune playground.
Background
Before you jump into your DAW, you should be familiar with the characteristics of third and fourth-generation videogame sound processors so that you can effectively emulate them in the digital domain. Consoles had distinct timbres and sonic qualities due to their technical specifications. However, they all had certain commonalities which were mainly due to the technological limitations of the time. Needless to say, video game audio was very rudimentary, at least by today’s standards.
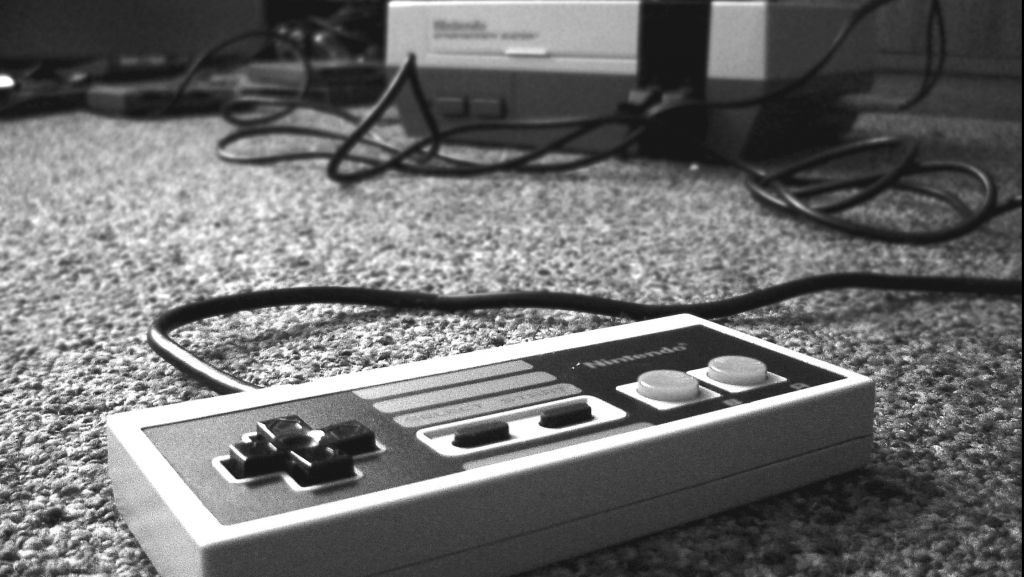
Broadly speaking, sound processors consisted of a few monophonic channels capable of generating basic, low-bit resolution waveforms or playing back low-quality digital samples. For instance, the groundbreaking Nintendo Entertainment System (NES) – home to the iconic Super Mario Bros. – had a 5-channel sound processor: two pulse-width modulation channels, a triangle wave generator, a noise generator and a fifth channel that could playback low-quality PCM samples.
Likewise, the Sega Master System – home to Sonic The Hedgehog – had a 4-channel sound chip: three square wave generators and a noise generator. It was also capable of producing a single PCM channel for low-quality samples. Their respective successors would gain a greater number of channels, faster sampling rates and higher bit resolutions. Some would also implement technological innovations of the time such as FM synthesis. For example, the best-selling Super Nintendo Entertainment System (SNES) comprised eight channels and could play back 8-bit samples. The Sega Genesis/Mega Drive utilized an FM synthesis chip which allowed for the generation of more complex waveforms.
Despite the limitations of classic sound processors, early videogame composers managed to create great soundtracks that still resonate with modern audiences today. Even though now we’re free from the analog constraints of vintage consoles, remembering these limitations is important, regardless of whether you want to emulate some hardware in particular or eclectically explore 8-bit sounds. Look up the technical characteristics of different sound processors, listen to videogame soundtracks that use them and pay attention to how composers got the most out of that hardware.
Making chiptune music in a DAW
In a DAW, we can achieve a chiptune sound by means of basic waveform synthesis (alternatively, you could also use 8-bit sample libraries) and digital signal processing including bit reduction, downsampling, overdrive and saturation, as well as time-based effects.
Firstly, as far as synthesis goes, we can use any virtual synthesizer which contains an oscillator that generates basic waveforms (sine, square, triangle, noise, etc.). In Ableton Live, we can use native plug-ins such as Analog or Operator and simply enable a single oscillator, select a basic waveform, and adjust its ADSR amplitude envelope. Hence, we can recreate the basis of 8-bit and 16-bit videogame console sound generators.


Next, to recreate the sound quality of any console, we need to take the bit depth and sample rate of each channel into account. For example, in the case of the NES, all sound sources are 4-bit cycling waveforms except for the PCM sample channel which can play back up to 7-bit PCM samples at a sampling rate of 15.7458 kHz (although usually the bit resolution and sampling rate at use were much lower due to limited cartridge space). In a DAW, we can degrade the overall sound quality by using bit reduction and down-sampling plug-ins, also known as bit crusher effects. In Ableton Live, both audio manipulation techniques are available in the Redux device.
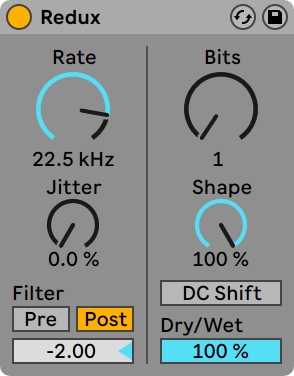
The down-sampling controls, which are on the left side, essentially allow you to reduce the sampling rate (the Rate knob) and add noise to the signal (the Jitter knob). Inharmonic frequency content is thus introduced into the spectrum which can result in a harsher, more distorted tone. You can also apply a filter before or after the sample rate reduction process which allows you to control the bandwidth of the signal processed by downsampling. On the right side, the bit reduction controls allow you to reduce the bit resolution of your signal which affects its dynamic range and also adds distortion and noise. The Bits control reduces the bit depth of the signal while Shape affects the tone of the signal by adjusting the quantization curve being applied. Both of these controls can be adjusted in different ways to emulate the specifications of particular consoles.
In addition, we can also apply tone colouring effects such as overdrive and saturation to add analog warmth, as well as time-based effects such as reverb and delay which were also available in the sound processors of many consoles.
Example: Emulation of the Nintendo Entertainment System (NES) sound
For the sake of this example, we’ve decided to draw inspiration from the sound characteristics of the NES by utilizing only five channels and respecting their specifications in terms of waveform, bit depth and sampling rate. As a disclaimer, the goal of this example isn’t to perfectly emulate the sound of the NES, but rather to show you some of the steps you can take to emulate the sound of any classic console.
Three iterations of Analog were utilized to generate two square waves (with different pulse widths and ADSR envelopes each) and a noise generator. The two square wave channels mainly serve as the melodic and harmonic content of the song while the noise channel plays a percussion line. For the bass line, Operator was used to generate a triangle wave. All of these instruments are followed by Redux and Utility devices in the audio effects chain, in order to set the appropriate bit depth as well as convert the signal to mono.

Finally, some Linndrum LM-1 drum samples were added in the fifth channel to provide the rhythmic backbone of the song. In this case, the sampling rate was also reduced to 5.14 kHz, below the bandwidth limit mentioned earlier. A Saturator device follows in the audio effects chain as well as a Gate device to control the transients of the signal. Other effects in some of the tracks include a small amount of Overdrive and Chorus, as well as Delay and Reverb sends.

If you are using Ableton Live 11, you can download all the .adg files from here:
NES 8-bit adg Channels – DOWNLOAD
As you can see, not much is needed to approach the emulation of classic gaming sounds in a DAW. However, as with any craft, it takes practice and dedication. Go ahead and start messing around with the tips we’ve given you in this article!

 50 Industry Music Production Tips You Must Know


