Today we will be showing you how you can take pre-existing sound samples from nature (wind, rain, fire, tree rustling) to generate extended soundscapes. We will first be looking at what makes a sound appear continuous to our ear. Then we will be exploring the editing techniques to generate new audio from preexisting samples.
Ambient tracks
Taking a short sound sample and making it continue as one sound is especially useful for when you want to make a very long background layer for a visual, transition to a song, live set, audio installation, or when making ambient music.
Sometimes it is not possible to find a rain or wind sample that sounds perfect for three hours. Inside the sample there is an interfering sound, a strange discontinuity, or the original sample is only one minute long.
Initially we might try to loop a short consistent portion of the sound file over and over again, but looping a very short sound for a large length of time will not result in a good representation of the subtle inconsistencies that occur in nature.
My definition of a good continuous nature sound for this article will be a sound that cannot be recognised as a loop and does not have any audible jarring artifacts that will make us lose focus from listening to the central sound.
The following wind sample I will be using today for this instruction is from the sound library soundsnap: https://www.soundsnap.com/

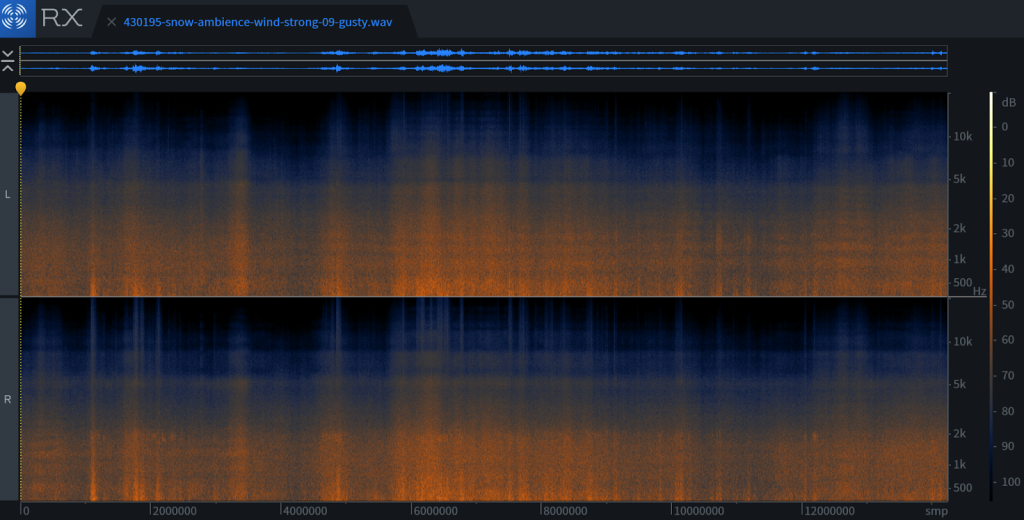
In the unprocessed audio file we can see some harmonics of the wind sound which appear as orange layers from 0 Hz to roughly 8 kHz. The orange color indicates where the amplitude of the signal is the loudest as compared to a darker blue where there is less amplitude of the audio signal. We notice in some parts the wind increases its strength and is much louder than in other portions where it is quieter and constant.
Here is the sound of the unprocessed raw wind sample:
Here is an example of the wind sound that has been looped. It contains an audible whoosh for every repeat of the loop. Nature does not have this kind of predictable rhythm.
We will be avoiding ending up with the previous result by covering how to properly make crossfades and sample layers.
Crossfades & Layering
When working with audio file manipulations for making blends of different parts of a sample you always want to be using crossfades as it may result in an audible click/pop for every repeat if you don’t use them from the sharp changes in level.
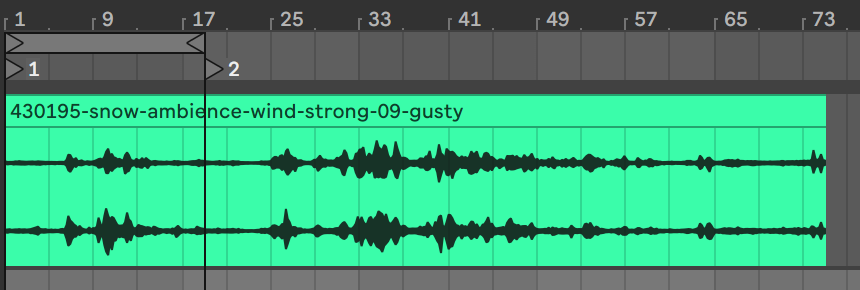
In the following image I have selected the portion with the least amount of variance in the wind sound. This is the portion of the audio we will be most interested in as it is the most constant in amplitude and there are very few spontaneous gusts of strong wind. Some inconsistencies we should watch out for to decide on the right position might be the cracking of ice, the recording engineer’s crunch of their feet on snow, birds, and any rustling of clothing.

In the following image we have taken the most unvaried portions from the first audio portion (highlighted in orange) and have created a visual step to help crossfade slices together. I have cut uneven portions of the first orange audio clip from above and have created fades in places that are not the same. We are looking to prevent an audible beat or rhythm in the sequence of clips.
A fade of 1.5 to 2 seconds should be sufficient to prevent clicks in the audio. This is blending the amplitudes of the two sequences together to help create a consistent volume between the two transition points. If we listen to the initial wind sound we notice that it can take from 1.5 to 2 seconds for the wind to change. For this reason the fades need to be longer.
By having more than one track we can visually make fades easier and identify what we have repeated easily.
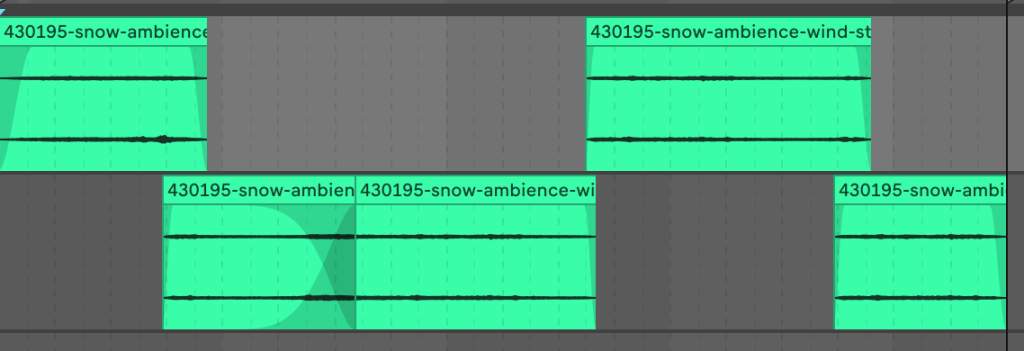
In the second image I have duplicated those two tracks and moved the same files to the end of the prior sequence.
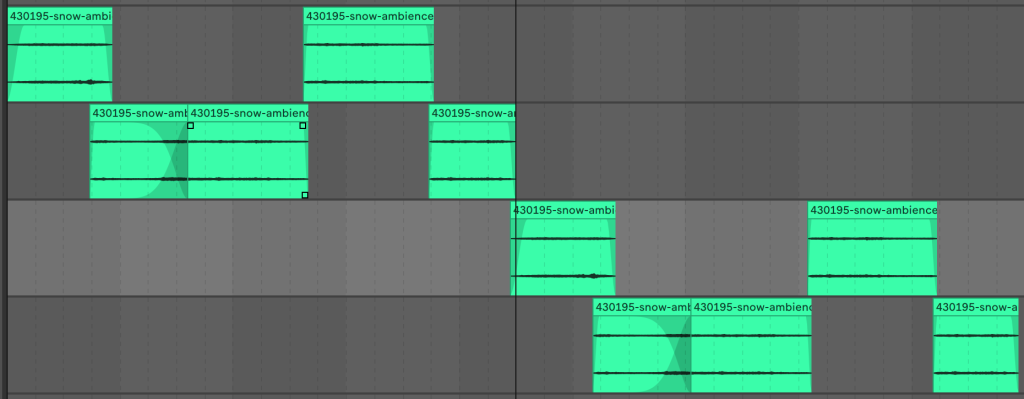
In the case of wind the attack and release of a gust is the same so we can reverse the sound to help us blur the idea of where the sequences begin and end. In this image we have made some adjustments on the fades and reversed a few sequences.
We will add an equalizer to help reduce the appearance of the low end changes and a compressor to prevent the audio amplitude from getting louder than the loudest wisp.
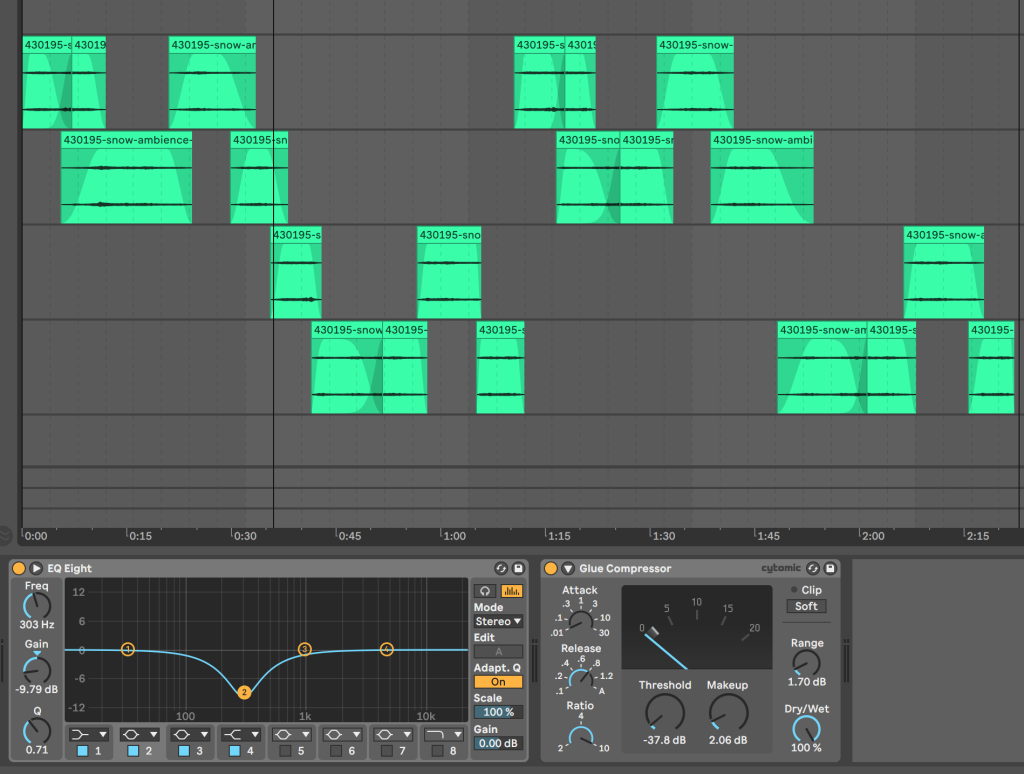
In order to have a wind sound that perceptibly changes over the course of an hour we could copy and paste these audio clips and make slight overlapping changes at the edges to blur where the beginning and ending of the sequences are to the listener.
If we want an audio segment to last for 3 hours and we have 10 minutes, it is not possible to make these edits because we have to listen to all of the edits in real time. How do we achieve the same result without using the time listening back over all of the samples?
What we have just done with editing is to create a randomisation of cuts to create new material that sounds natural from the most constant position in the original audio source file. In a future article we will look at useful synthesis techniques to simplify this process.



 50 Industry Music Production Tips You Must Know


