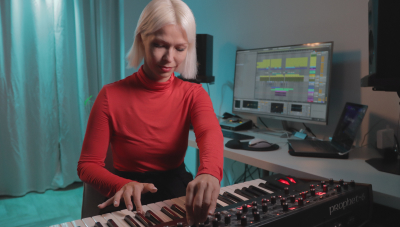
In this article I will be talking about how to use noise gates in some creative ways. We will be taking a look at how you can make motion on static instrument sounds so that they fit more with the rhythmic elements already in your track and help keep the motion of the track moving. We will also be taking a look at how you can use gates to shoot your listener into some unique spaces. Your melodies and rhythmic content will now become musical event triggers for other events such as gated reverbs and delay clusters.
What Is A Gate?
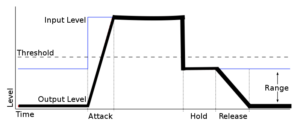
Originally gates in audio were used to suppress noise from a given signal when the desired signal was not present on an audio channel.
For guitarists a noise gate would be used to suppress the amplifier power noise when a guitarist would not be playing their instrument so you would have silence when the guitarist would not be playing.
In another example, let’s say you have a noisy environment around four people speaking on camera for a video recording. It is helpful to have a noise gate so you make sure that when one person is speaking at a time all of the background signals on their individual microphones do not add up to a very loud noisy signal when each of the speakers is not talking. When a person stops speaking into the mic the channel is automatically muted. Otherwise without the noise gate you would have three channels of noise summed together.
Today we will be looking at how to creatively use gates not to stop noise but to control the shape of an instrument signal that is not moving a lot in a mix.
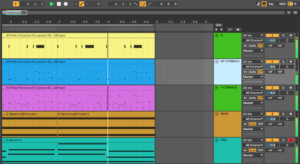
We are going to be using the standard gate from Ableton. In our current project we have a kick drum on the first track, then some non tonal cymbals, tonal cymbals, a bass sequence, and then a pad synth. We will begin by testing how to use a gate with our NT CYMBAL track.
Currently when we play our track without the gate we have a bit of reverb on the non tonal (NT) cymbal so it gives us the appearance that the percussion extends into a space. When we attach the default gate we see we have the threshold and return parameters on the left and the given envelope controls (attack, hold, release) as well as the floor parameter on the bottom of the device. Currently the top peaks of the audio signal are between -12 and -18db. Based on the timing factors of the envelope we are hearing the signal as shown in white on the device. Once we hear the main impact of the percussion then the reverb tail is being cut out.
The attack parameter controls how fast we will see the signal cut out once the signal is below the given threshold.
The hold time dictates how long the gate will stay closed before it allows signal to pass to the output again.
If the release time is really long when the signal is being cut it will take that amount of time set by the release parameter to open the gate and allow signal to pass through to the output again.
When the yellow bar is present at the right of the device that means audio is being cut just like the compressor device in Ableton.
Now we have reviewed the essential parts of the gate and can start taking a look at how to make our track more interesting.
Below you can see the non tonal cymbal hits being gated.

Gated Audio Without Reverb:
1. Sidechaining With Gates
Let’s now take a look at our pad track. It is quite static in the sense that the rhythm is just whole notes of held chords. We will change this with the use of a gate.
I have added a gate onto the pad track and pressed the left hand arrow at the top of the device to show the sidechain parameters. I will engage the sidechain button and in the “Audio from” dropdown I will select the kick. Now when we play the track we can see the greyed out kick in the background and our pad signal that is being gated in front. Now what we have is a pad sound that is triggered when we have a kick drum present.

We will adjust the threshold parameter to make sure we are opening the gate when every kick happens. Adjusting the attack, hold, and release will also allow us to define how much of the pad signal we want to keep passing to the output while the gate is open. I have dropped the floor parameter of the device to -inf so that the entire signal is cut when we don’t have a kick drum passing through the side chain input. You can now see the difference in the signal on the white FFT display. When there is no kick there is not a pad sound.

Pad + Kick + Bass:
2. Tremolo Effects
We are going to make a tremolo effect now by creating a really fast fluctuating input signal. I have created MIDI notes set as 32nd note divisions with space in-between so when the signal is present on the Metallic Hit track the gate on the pad will be open and when there is not sound on the Metallic Hit track we will clearly get a gate off and not hear the pad. The signal on the metallic track sounds as a chirp.

When we change the input signal on the sidechain of the gate device on the pad track we can hear the signal through the track by engaging the headphone button and playing the project with the pad track solo’d. We then will adjust the threshold parameter so we are just touching the top peaks of the audio signal. We want to hear fast audio chops in the pad sound based on the percussive sidechain control signal so we will reduce the hold and release times. I’ve also kept the floor parameter at -inf so we can hear the maximum dynamic change on the pad instrument.

What we have created now is a tremolo effect on our pad sound with a rate of 32nd note divisions based on our tempo.

Final Tremolo Pad:
3. Triggered Delays
We are now going to use our gate concepts to help make a stereo effects unit. We will have a reverb like effect on the left side of the stereo spectrum and a delay version of the instrument on the right hand side. I have gone ahead and added a new lead line track labeled as Pan Flute.
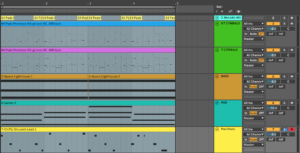
I have duplicated the Pan flute twice and set the first instrument (S1 C) to the center field, the second (S1 L) to the left, and the third (S1 R) I have panned to the right.

The first centered instrument does not have any effects on it, but the volume is adjusted to -6 db to compensate for the summed volume of three instruments playing the same notes in the same frequency range.
For the second instrument I have added a Eq to remove some of the low end and have added a slight dip at 1 KHz to change the frequency balance relationship to the right hand side instrument. I then have added a gate that is using the control signal from the Pad track for the sidechain input followed by a reverb set to 100% Wet.

On the right hand side I have a gate followed by a delay set to 100% Wet and a redux device to change the timbre of the delayed image of the dry signal. Following the redux device I have another gate. For the first gate I have a sidechain input control from the kick track and then I have engaged the flip on the gate so that every time a kick drum is not playing the gate is open and signal is passing into the delay. In the final gate on the track I am using the sidechain input from the Pad with a long hold and release time so that when the pad is playing we will hear a delayed signal, but when the pad is silent we will not hear a distorted delay of the Pan Flute on the right hand side.

The perceived effect is the dry Pan Flute signal in the center of the mix with occasional hits of Pan Flute in reverb on the left of the mix and occasional distorted delays of the Pan Flute on the right.
Here is the final loop with all of the effects engaged:



 50 Industry Music Production Tips You Must Know


