If you have started mixing recently and you need new tips and ideas to improve how your music sounds and your workflow when mixing, this is the place for you to be!
Right or Wrong?
As in almost any discipline, one of the best ways to learn mixing music is to follow those who already have experience. Through imitation of the professionals’ techniques, we begin to understand the ins and outs of musical production, until we get confident with our own music.
However, common production practices are not immutable and inviolable laws. And in fact, we could fall into what might be called “the rules of music production” and stop considering that there are different ways of doing things.
Still, in order to break the rules, you need to know them first. If you are not aware of them, it is easier that you find yourself in a point in which you don’t know why your mix does not sound as you like, and not having the resources to fix it.
What to do with the following tips?
It is possible that we do not go as deep as you would like with some tips. Still, we hope to be giving you a start point with some concepts in order to continue learning about it.
If you are interested in going deeper on a specific a topic, leave a comment below and we will solve any questions you have. If we think it can help, we may even go and create a whole post about it.
Having said that, let’s start!
1. Careful with having the buffer size too low
This tip is for all of you who have this problem: your computer is only able to play a few seconds before annoyingly jumping or freezing, or your system just totally crashes and you consider throwing the computer through the window. Then, you calm down and then you think your computer has a memory issue that you cannot solve until you have a better computer. I know, that is happened to me.
It could be that you need a more powerful computer, and in fact you will need it if you want to use lots of heavy plugins at the same time, believe me. But there is something easier you can do before taking any drastic measures, that is, to change your DAW’s settings. Specifically, the buffer size.
“Buffer size” helps computers to handle latency. Latency is a delay when listening back to your audio caused because the computer has to process lots of information before it can send the audio back out to you. A low buffer size (32 or 64) tells the computer to analyze very little data before sending the audio back out to your headphones, which is perfect for recording because it gets rid of latency.
However, since low buffer size is really heavy on computing power, when you’re mixing, and you have to play lots of tracks at the same time, having a lower buffer size will cause your system to freeze over and over. So, find the buffer size option and change it to a higher setting (512 or 1024).
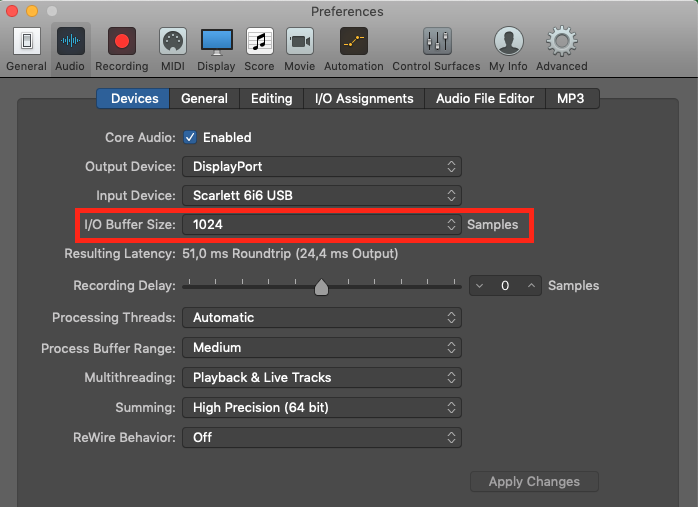
You can find the Buffer Size settings in the Preferences
2. Avoid mixing tracks in solo
This is a logical one whether we like it or not. You can spend a lot time making an instrument sound perfect in isolation but that does not mean that it will sound equally perfect when along the rest of instruments.
If you apply your effects on an instrument without continually comparing it with the rest of the mix, chances are that you will lose context perspective. Mixing is about taking decisions that will help your tracks interact better with each other. So, if you have your solo button on, how are going to take such decisions? If you can’t hear how the frequencies of your instrument interact with the others, for example, your EQing is going to be pointless.
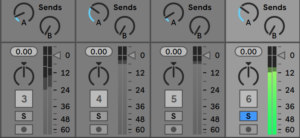
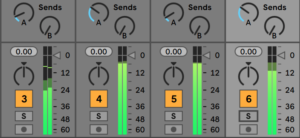
Again, we are not saying never use the solo button. You need it to know what information is being played in that track and to solve any problems it may have in isolation. But when mixing, get used to applying processing taking into account how it sounds along with the rest of the song.
3. Be careful with using too much processing
You may have seen some tutorials so far, in which you have seen they use an EQ and Compressor in every single track. Now, since you may be still a bit inexperienced with the use of this processing issue, you may think it is indeed a good decision to just add the EQ and Compressor too in every track without questioning. Still, you may have found many times that it does that not make your track sound any better, right?
Why? Because the key is not measuring the quantity of effects you apply to your mixes. The key is finding the reasons why you are applying such effects. If you are tempted to apply a compressor to a track, first think, what is your objective with it? What problem do you have with that sound that can be solved by compressing it? If you can answer these questions reasonably, then add the compressor.
4. Consider using bus tracks
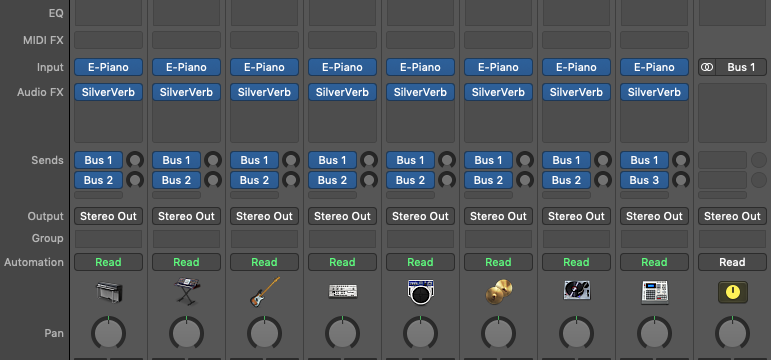
This is what happens, you start adding instruments to your arrangement and in each track you place a reverb plugin, so every instrument fits in the space you are creating. However, after a while you realise you have a lot of reverb plugins being used, with similar settings, which are using a lot of your CPU and probably not giving you general homogenous reverb in your track, because they do not have the exact settings unless you duplicated the plugins.
In this example, we are using eight almost identical reverbs, which is not very efficient or practical
Is that your case? because if it is, you need to know there is a much more efficient way of doing it by using a bus track. Place your general reverb plugin in the bus track and send the audio from your tracks to the bus, in the quantity that feels fine to you.
This will give you more control on the effects too, when comparing your tracks with reverb and without. When you solo the bus track you will be able to hear the reverb of all of those tracks together, and if you mute it, you will be able to hear the tracks dry in quick way.
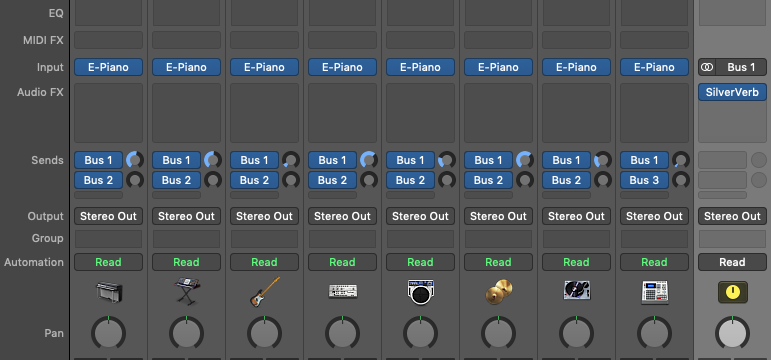
In this example, on the other hand, we are sending the signal of the tracks to the reverb in the bus track
Of course, this is not applicable to a special reverb you are applying to an instrument with sound design reasons, or if you need to give a very different space to a particular instrument. Then, you are going to add a reverb directly on that track and set it in the way you need it to be, of course. However, now you know you can always use bus tracks, to be more efficient with your CPU and to have a better control of the effects you are applying.
5. Be careful with boosting too much when EQing
Notice that we are not saying ‘never boost more than 6 dB or 10 dB’ as you may have heard from other mixing engineers. If it sounds right within the context of the full mix, then it is right.
However, you may have encountered the case that you are boosting and boosting but never making it sound as you like. When that happens, normally the raw sound you are using is not actually very suitable for the arrangement in the first place. Then if you find boosting your bass a lot to hear its low end, for example, it could be that it is the wrong bass you are choosing for your track. Why don’t you try with another one before having to over process it?
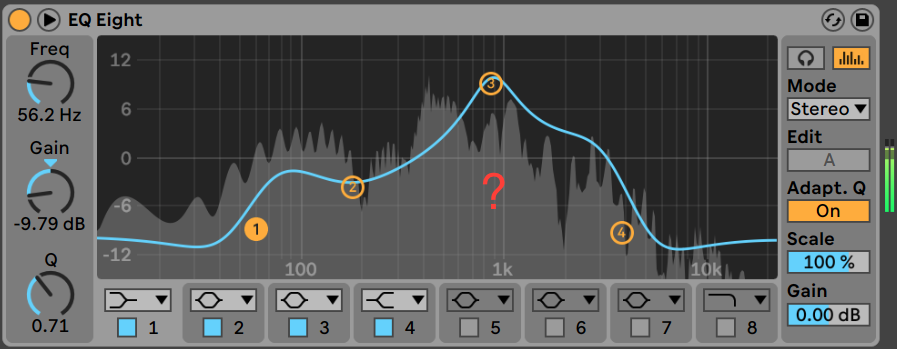
If still you want to use that bass sound, you may feel disappointed even when applying lots of boosting. You may still not able to hear its low end, and it is probably because you have other instruments competing for the same frequency range. This is why you may have heard before the rule ‘it is better to cut than to boost’. We are not saying it is always the case, but If you have, let’s say a synth with a lot of low end that is clashing with your bass, then you are for sure going to have to trim it to let space for your bass low end to be heard.
Remember that EQ only really changes the gain of frequencies that are already there, rather than adding anything new. And don’t forget that when increasing the gain to much can cause distortion in the audio path (!) So if you’re after a big change of sound you’re probably better off using some other effect that generates additional frequency information, such as a distortion or an exciter, instead of only EQing.
6. Be careful with adding too much low end
This is what happens. You have spent hours mixing your new track and you are so happy about how it sounds. But then, when playing your track at your friend’s living room hi-fi speakers, that punchy low-end you were so happy about in your studio is suddenly not there, it sounds muddy, or even worse, it sounds distorted!
Knowing how much low end your track should have is a difficult question for many reasons. Firstly, it is your room, which probably doesn’t have the best acoustic treatment and, therefore, it’s giving you wrong low-end information when mixing. Another problem is the monitors. If they are small nearfield ones, they may be hiding low-end, if you have a subwoofer it may be showing you too much of it (apart from annoying your neighbours). If you are using headphones, these tend to exaggerate the low-end too.
Another reason is the lack of experience treating your low-end information. But that is something you will be learning with time. One first thing you can do is to play your track in as many different speakers and headphones as you can, and take note of what works and what doesn’t. If you hear distortion in many of them, you may have a real problem to be solved in your mix. Eventually, by doing this many times, you will learn what low-end information your mixing speakers are giving you, in order to prevent problems when playing your tracks in the rest of speakers.
Another thing that really helps is visually controlling the low-end with an spectrum analyser. In fact, with an spectrum analyser you will be able to control the frequency balance in general of the whole mix. SPAN by Voxengo can be downloaded for free and will you feedback of the frequency content of all your track when placed in the master track.
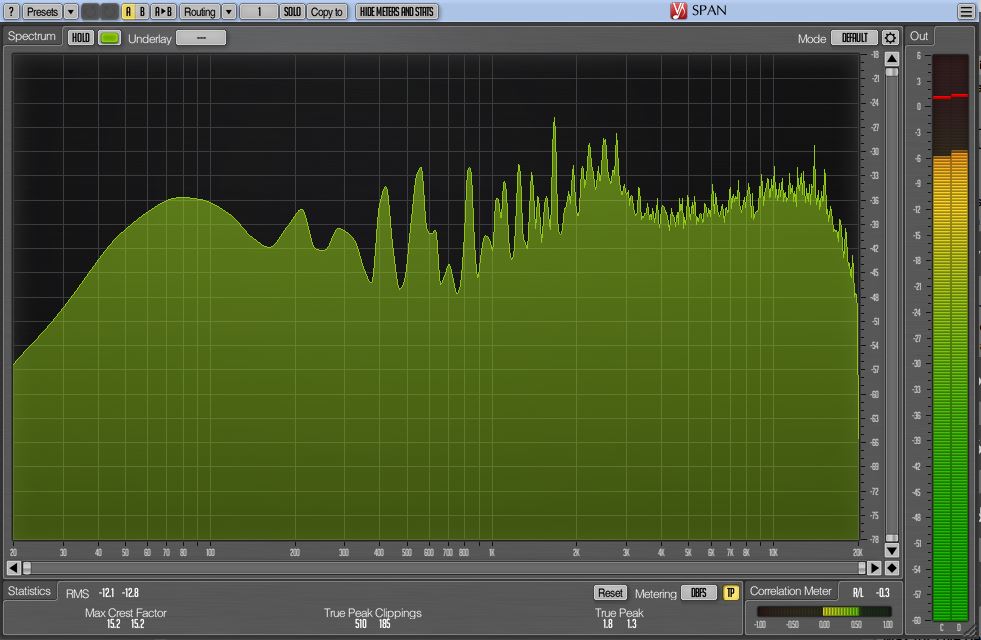
If you don’t know what a healthy frequency content shape your track should have, find some tracks of another artist that you think are well mixed and of a similar style to the one you are composing. Observe what shape they have through the spectrum analyser and use them as reference tracks.
If you find that you have too much low end, one thing you can do is to remove some of the low frequencies you don’t need in your tracks, so they do not accumulate and add a boomy noise. That will help you clean the mix and leave space for the low frequency content you really want to be heard. However, we recommend being careful with high passing too many tracks without considering each one’s needs independently. We explain you more about this in the next tip.
7. Be careful with over-filtering
The tip here is to be careful when applying deep cuts with the equalizer, such as the high passing EQ we were talking about in the previous tip as a way to remove low frequencies that may be adding useless noise to your mix.
One risk of high passing too many of your tracks is that your mix could end up sounding too thin and brittle. Of course, you have to leave room to the instruments that have priority, but your mix could end up losing liveliness if you get too drastic. That is why we recommend being careful and listening to each instrument against the mix (remember tip num. 2). Go track by track and consider removing the low end or keeping some of the resonances the instrument is providing to the mix.
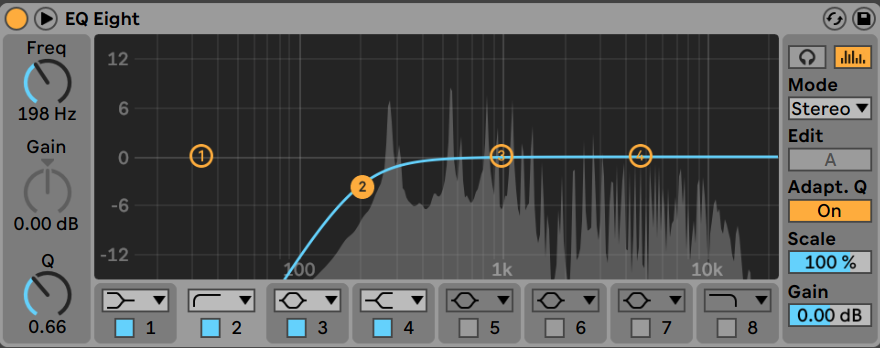
Another thing you may want to do is to avoid filtering multiple tracks at the same frequency. Otherwise, you could end up with an unnatural sound and create a buildup in that frequency. So, if you decide either highpassing or lowpassing a few tracks at the same frequency range, be aware of doing it differently each time. Do not cut consistently at 100Kz, to give you an example, in order to remove the low-end rumble. Rather, maybe some high synths can be cut at 400Hz, some mid drums can be cut at 150Hz, the hi hats at 300Hz, and some low synth may eventually not be cut and just attenuated at around 90, etc.
One more thing you need to take into account is that applying EQ can create a phase shift in a sound wave. Phase shift is not an issue if you don’t have a second similar wave sounding at the same time, causing phase cancellation to the first one.
It is not that usual in electronic music because you are normally using just one-track instruments or samples. However, if you duplicate one track and you equalized both versions separately, you could end up with two waves out of phase. That is why, it is a good idea to equalize duplicated tracks in a bus (as we explained in tip num.4)
At this point you could be wondering, why to worry about phase issues? You may notice you have phase cancellation audibly because the sound loses presence and feels thin. It could be that you are actually looking for that effect and you are happy applying it to your mix. Then fine. But it could be that you go mad trying to understand why your synth, let’s say, sounds hollow if you are in fact adding layers to it. Shouldn’t it sound even fuller? Well, this is why we said rules need to be known first to be happily broken.
8. Have your phase correlation under control
In the previous tip, we said that you may become aware of phase issues because you start hearing that some elements in your mix go thin and lifeless after layering them or after duplicating and processing them separately. You can also create phase issues by manipulating the stereo of your signals, or adding some other effects that may manipulate the phase relationships, such as the reverb. A way to really notice these issues is turning your mix into mono. When so, it is easier to hear that some elements sound thin or even may have disappeared.
The tip here is just, be aware of them. It can be very difficult when you are a beginner, or when your room treatment and speakers are misleading you. But then you can use plugins that can help you visually have control over it, as we saw in tip num. 6 with the spectrum analyser.
Correlometer by Voxengo is a free plugin that will help you see if you have phase cancellations. Place it in any track you think it may have phase issues. You can place it in a bus track where you have some elements you suspect are cancelling each other, for example, or in the master track if you think your left and right information are cancelling each other in some degree
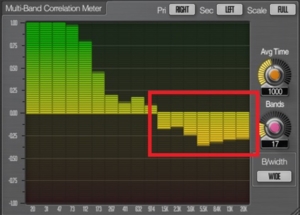
Correlometer showing you some phase issues in the high frequencies
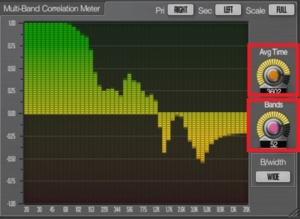
Parameters to adjust the average time and detail of the display
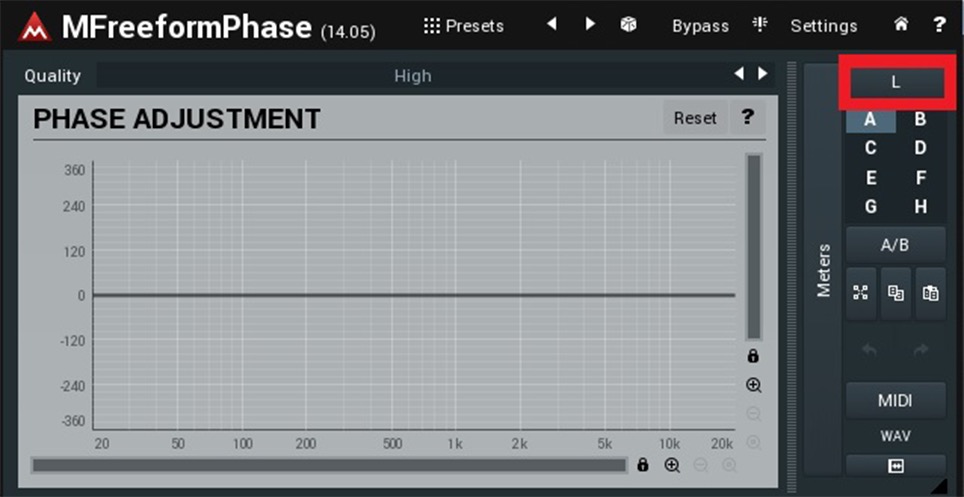
If you decide to solve the phase issues you encounter, there is another free plugin that can be handy for doing so quickly. MFREEformphase by MeldaProductions lets you adjust the phase correlation of the signal by manipulating your left or right phase information, in order to make the general correlation more balanced:

Set the MFREEformphase before the Correlometer

Adjust the MFREEformphase until you see there is no flipped signal showing in the Correlometer
Notice that the L (left) side was selected in this example. You can also manipulate the R (right) side if needed in your case. But be aware that if you select the L+R option, you won’t be doing any changes to the phase correlation:


 50 Industry Music Production Tips You Must Know


